Building a homemade pet sanctuary seems like the perfect weekend project. You get to save money, upcycle old shipping boxes, and entertain your furry friend all at once. It feels incredibly rewarding to craft a cozy, personalized space for them.
However, hidden friction points often plague these homemade builds. You might face structural collapse under a heavy pet, tolerate ugly aesthetics, or unknowingly risk exposing them to toxic adhesives. Recognizing these pitfalls matters deeply. Your pet's safety and comfort are non-negotiable, and poorly constructed structures fail quickly.
This guide outlines the exact steps to engineer a durable corrugated structure from scratch. We provide a straightforward evaluation framework to help you decide your next steps. Ultimately, you will learn if this project is worth your time compared to investing in a pre-engineered alternative.
Key Takeaways
Material dictates lifespan: Standard shipping boxes degrade rapidly; successful builds require double-wall corrugated cardboard for load-bearing structural integrity.
Safety is non-negotiable: Tape and industrial adhesives pose chewing hazards; mechanical joints (tabs/slots) and non-toxic PVA wood glue are mandatory.
Design limits: DIY cardboard cat house design is often limited by material size and cutting precision, whereas commercial alternatives offer reinforced multi-tier architecture.
Build vs. Buy: Time investment and material sourcing often exceed the cost of purchasing a pre-cut, precision-engineered custom solution.
1. Assessing the Reality: DIY vs. Engineered Cardboard Cat Houses
People often view homemade projects as completely free. They grab empty delivery boxes, find some scissors, and start cutting. However, true costs remain hidden. You must factor in your personal time, specialized tools, and the surprisingly short lifespan of standard household packaging. A basic DIY cardboard cat house built from single-wall boxes rarely survives a playful feline for more than a few weeks.
To determine the best approach, you need a clear performance evaluation framework. We assess every enclosure using three specific criteria.
Weight Capacity: Can the roof support a 15lb cat jumping onto it? Felines love high vantage points. If the roof buckles under their weight, they will abandon the structure.
Scratch Resistance: Will the floor shred within a week? Cats instinctively knead and scratch. Flimsy floors turn into messy confetti almost immediately.
Aesthetic Alignment: Does it look like a pile of trash, or does it fit your home decor? Living rooms require furniture, not recycling bins.
Based on these criteria, you generally face two distinct solution categories. Approach A involves pure homemade construction using upcycled single-wall boxes. It offers low upfront costs but yields low durability and demands high effort. Approach B involves purchasing a pre-cut, commercially engineered structure. It requires moderate financial input but guarantees high durability and zero design effort.
Build Approach Comparison Chart
Feature
Approach A (Upcycled DIY)
Approach B (Pre-Engineered)
Material Grade
Single-wall (3-ply)
Double-wall (5-ply) or better
Structural Integrity
Low to Moderate
High (Supports 15lb+ cats)
Assembly Time
3 to 5 hours
10 to 15 minutes
Aesthetic Appeal
Raw packaging appearance
Custom printed, decor-friendly
2. Material Selection and Safety Compliance
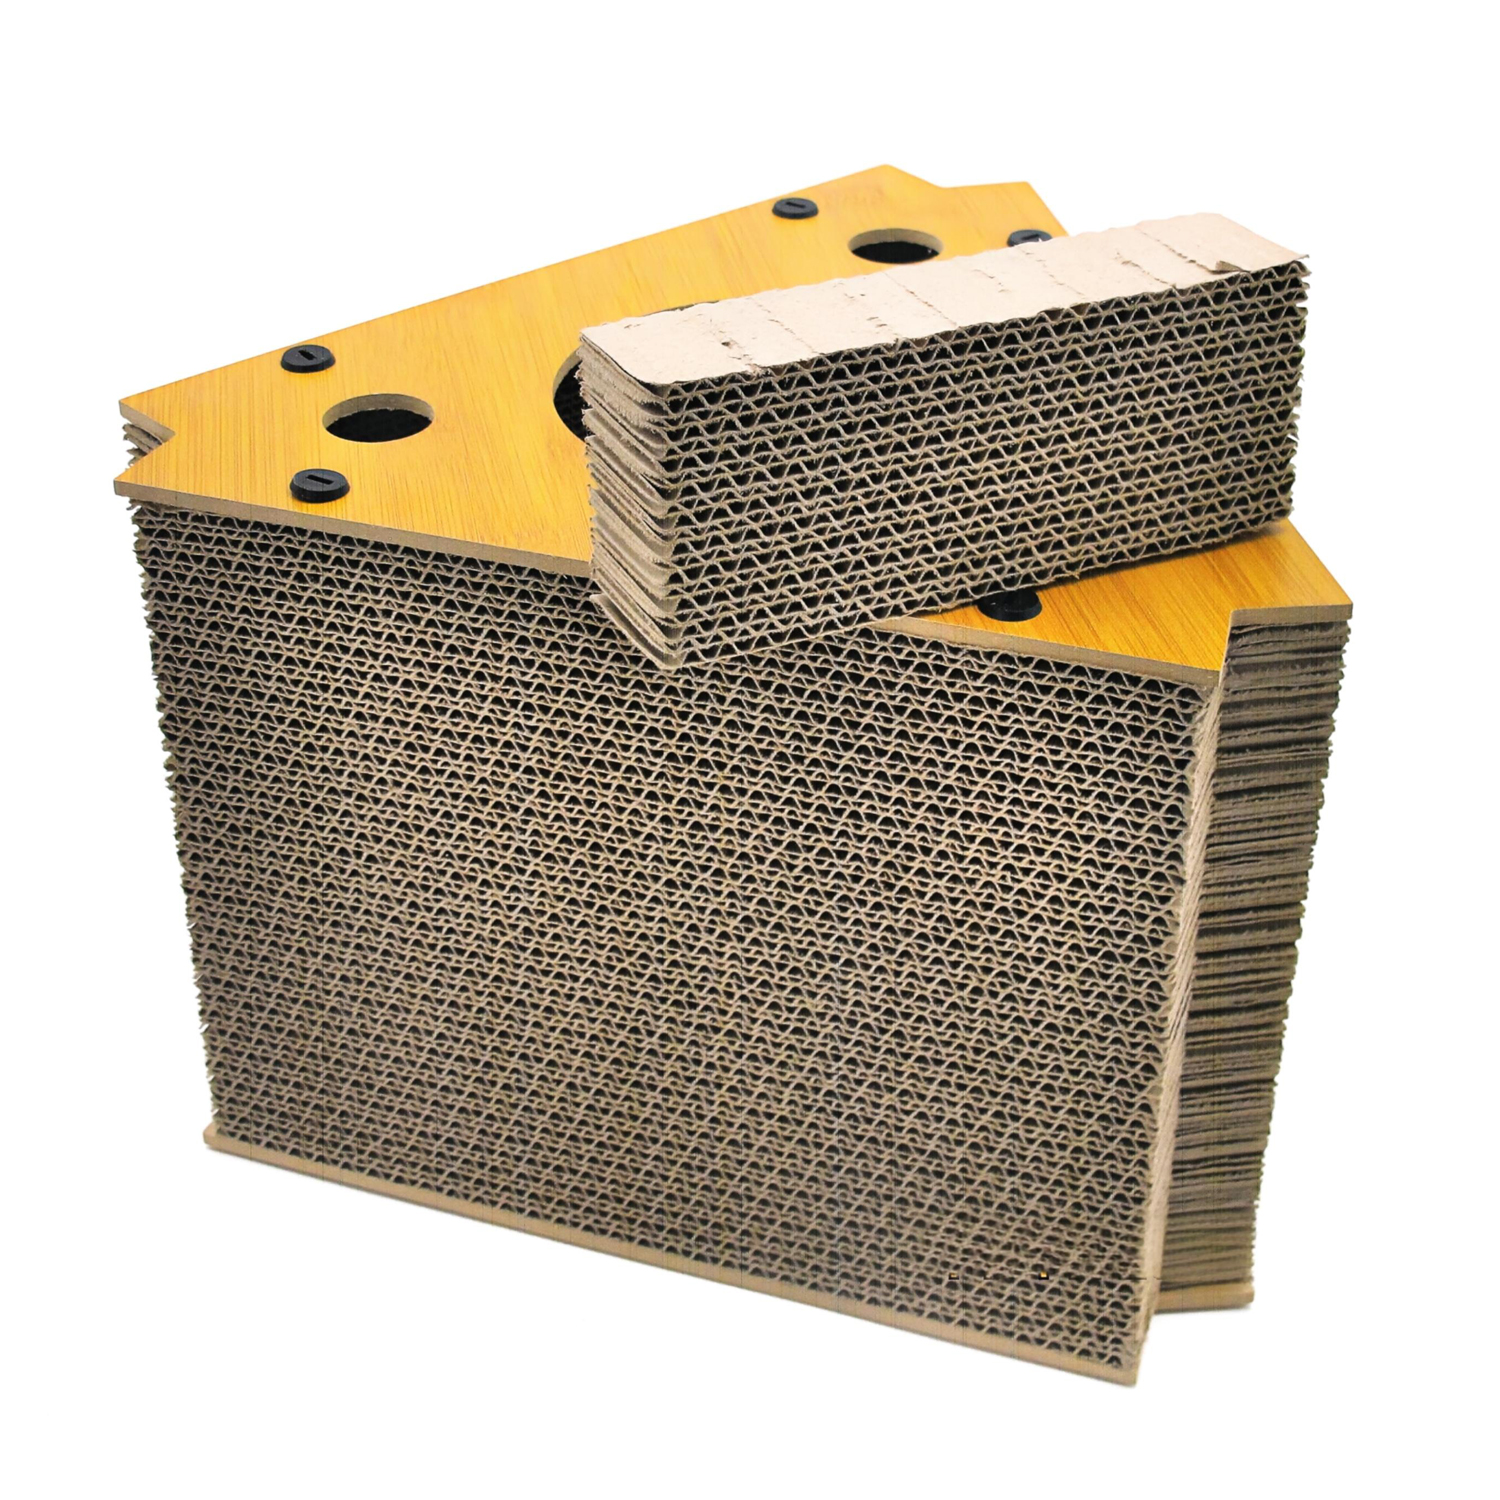
Choosing the right corrugated cat house structure defines the entire project. Not all paper products behave the same way under stress. You must opt for double-wall (5-ply) corrugated sheets over standard single-wall (3-ply) delivery boxes. Double-wall materials provide the necessary rigidity to prevent sagging.
Furthermore, you must identify the flute direction before cutting. Flutes are the wavy ridges sandwiched between the flat paper liners. Vertical fluting acts like pillars supporting a ceiling, easily bearing heavy weight. Horizontal fluting folds instantly under pressure. Always orient your load-bearing walls so the flutes run straight up and down.
Toxicity and Hazard Checks
Safety checks protect your pet from invisible household dangers. Cats explore their world using their mouths. They chew, lick, and rub against edges constantly. Avoid packing tape entirely. It poses a severe ingestion hazard and can cause dangerous intestinal blockages. Skip standard hot glue as well. It becomes brittle over time and sometimes contains toxic industrial compounds.
Instead, use pet-safe adhesives. Non-toxic PVA wood glue or simple starch-based pastes work perfectly. If you recycle old delivery boxes, inspect them rigorously. Ensure they remain completely free from agricultural chemicals, heavy-metal shipping inks, or previous pest exposure.
Required Tools
Precision requires the right equipment. Dull tools cause tearing, which weakens joints and creates ugly, frayed edges. Gather these specific items before starting:
Heavy-duty utility knife (keep extra blades handy for clean cuts)
Metal straight-edge ruler (plastic rulers easily chip under a knife)
Self-healing cutting mat (protects your floors and tables)
Bone folder (essential for creating clean scoring lines)
Best Practice: Always change your utility knife blade after every five major cuts. Paper degrades metal edges surprisingly fast, and a sharp blade prevents crushed flutes.
3. How to Make a Cardboard Cat House Step by Step
Mastering how to make a cardboard cat house involves careful planning and execution. Rushing the process guarantees crooked walls and wobbly roofs. Follow these engineered steps to ensure maximum stability.
Step 1: Drafting the Design. First, measure your cat. Record their length from nose to tail base, and their height from paws to ears. Map out your base panels and load-bearing walls accordingly. A proper cardboard cat house design incorporates a pitched or flat reinforced roof. Ensure the interior gives them enough room to stand up and turn around completely.
Step 2: Scoring and Cutting. Do not cut freehand. Ever. You will lose structural squareness. Score your folding lines first using a bone folder. Scoring creates a gentle groove, ensuring clean folds without crushing the vital internal flutes. Cut entryways slightly larger than the cat's widest point to prevent them from getting stuck or tearing the edges.
Step 3: Creating Interlocking Joints. Rely on structural tension rather than just glue. Cut tabs on the edges of your wall panels. Cut corresponding slots into the floor and roof panels. When pushed together, these mechanical joints lock the walls firmly into place. They distribute stress evenly across the entire structure.
Step 4: Assembling and Reinforcing. Assemble the base structure first. Slide the tabs into their slots dry to check the fit. Once verified, apply a thin layer of non-toxic PVA glue to the interior of the interlocking tabs. Push them together and hold them using spring clamps until fully cured. Wipe away any excess glue immediately; ensure no residue seeps out where a cat might lick it.
Step 5: Adding Functional Elements. A lightweight box tips over easily when a heavy cat leans against an inside wall. Insert a tight-fitting corrugated scratchpad directly into the base. This simple addition adds necessary floor weight, lowers the center of gravity, and prevents tipping. It also keeps their claws safely away from your furniture.
Common Mistake: Many builders forget to account for the thickness of the double-wall board when cutting interlocking slots. Always measure the exact thickness of your material, and cut your slots exactly that wide. Too loose, and the house wobbles. Too tight, and the board crushes upon insertion.
4. Implementation Risks and Common Structural Failures
Even carefully planned projects sometimes fail. Understanding common weaknesses helps you preemptively reinforce your build. Paper-based materials possess inherent vulnerabilities.
The "Soggy Bottom" Effect
Paper absorbs moisture rapidly from ambient humidity and cat breath. If you place your newly built enclosure directly on a cold tile or concrete floor, thermal changes occur. Condensation forms underneath the base panel. Over just a few weeks, this moisture warps the bottom. The glue fails, and the floor slowly rots. To avoid this, always elevate the base slightly or place it on a warm rug.
Roof Collapse
As mentioned earlier, failing to align the vertical fluting of the wall panels with the downward load of the roof guarantees a disaster. When a heavy cat jumps on top, the walls will simply fold in half. Furthermore, flat roofs span wide gaps. Without a central internal support pillar or a pitched A-frame design, gravity slowly causes flat roofs to sag over time.
Tear-Out on Entryways
Unreinforced entry holes serve as the first points of failure. Cats love to rub their cheeks against doorframes to mark territory. They also chew on raw, exposed paper edges. Within days, a perfect circular door becomes a ragged, torn mess. You can mitigate this by folding a thin strip of paper over the raw edge and gluing it down, effectively binding the exposed flutes.
5. When to Upgrade to a Custom Printed Cardboard Cat House
Eventually, every pet owner reaches a crossroads. You realize your homemade creation, while charming, cannot withstand the test of time. You need to apply simple shortlisting logic. If you require multi-cat durability, complex multi-story architecture, or specific visual branding to match your living room, pure DIY is no longer viable.
At this stage, you should consider the commercial advantage. Pre-engineered structures utilize massive industrial die-cut machines. These machines ensure absolute precision. They create perfect interlocking joints without ragged, exposed edges. The tension fits so tightly you often do not need any glue at all.
Furthermore, commercial customization operates on a completely different scale. For pet brands, veterinary clinics, or highly aesthetic-conscious owners, a custom printed cardboard cat house provides undeniable value. Manufacturers utilize safe, soy-based inks and industrial-grade water-resistant coatings. They source specialized double-wall and triple-wall corrugated materials you simply cannot buy at a local craft store or replicate at home.
Assess your time constraints honestly. Sourcing pristine double-wall packaging, measuring meticulously, and spending four or more hours carefully cutting parts sounds highly inefficient for busy professionals. If you value your weekend hours, browse commercially engineered solutions. They guarantee veterinary-grade safety, effortless assembly, and long-term structural integrity.
Conclusion
Building a homemade enclosure requires strict attention to material grade, flute direction, and non-toxic assembly methods.
Relying on interlocking mechanical joints prevents the structural collapse commonly seen in taped or glued single-wall builds.
Environmental factors like floor condensation and pet chewing rapidly degrade unprotected raw paper edges.
While crafting your own piece is rewarding for temporary play, long-lasting durability demands professionally die-cut, heavy-duty materials.
Your next step should be evaluating your time. If spending hours cutting stiff material is unappealing, pivoting to a pre-engineered commercial solution guarantees immediate pet safety and superior home aesthetics.
FAQ
Q: What is the best type of cardboard for a cat house?
A: Double-wall corrugated cardboard is the industry standard for durability and load-bearing capacity. It features two layers of fluting sandwiched between three flat paper liners, preventing the walls from buckling under a cat's weight.
Q: Is it safe if my cat chews on a DIY cardboard cat house?
A: It is only safe if the material is clean, any applied inks are soy or water-based, and the structure is completely free of toxic glues, hidden staples, and plastic packing tape.
Q: How long does a handmade cardboard cat house typically last?
A: Depending on cat behavior, ambient household humidity, and material quality, a homemade build typically lasts 1 to 3 months. In contrast, professionally engineered models often last upwards of a year.
We are a manufacturer specializing in eco-friendly packaging , pet supplies and home solutions, with 20 years of R&D and production experience in paper products and pet supplies. Now we have decided to go global, making our products accessible to everyone in every corner of the world.